Assassins teapot - makos/makat dam demostration
Description
PDFThe assassin's teapot: it has 2 chambers, where by closing the inlet hole of one only 1 liquid pours; when closing the other hole the liquid in the second chamber pours. Slice it in a slicer and you will see the separating wall (including the spout).
Steve Mould explains it a lot better: https://www.youtube.com/watch?v=jJL0XoNBaac
If you want to see the inner working of it better print in semi-transparent material or something very light and use a dark liquid on one side (like I did with orange filament and blue liquid).
HOW TO USE:
Example: https://www.youtube.com/watch?v=9TslbDdmJqo
Fill up: Use a funnel to fill or just cover one hole and yolo it in spilling some of the liquid.
Pick up with one hand, cover the hole with your thumb and pour. Switch hands to pour the other side.
My USE CASE for this is of religious nature:
During the Passover seider (pesach seider) it is used do demonstrate to little kids how from the same vessels can be blood (dam) and water (based off the well known midroshim). Obviously I will explain to them the trick - the purpose is to enhance the communication of the history with a visual demonstration.
[HERE goes SPEECH/WARNING about not using 3D printed items for food stuffs]
Print Settings
Printer Brand:
Creality
Printer:
Ender 3 Pro
Rafts:
No
Supports:
No
Resolution:
0.12/0.2
Filament:
eSun PLA+
Notes:
IMPORTANT: put a support blocker on the inside of the container including the holes.
I simply print without supports and it works fine.
The spout definitely does not need supports (unless you can't print at 45 degree angles for some reason) and the handle I've stretched high enough that I did not see much benefit from supports.
I printed at both 0.2 and 0.12 and both work just fine. I use 3 layer walls (CHEP's CURA profiles).
How I Designed This
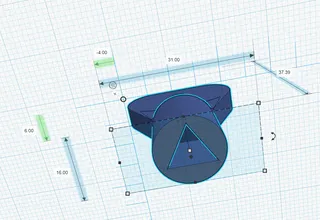
Lots of trial and error in Tinkercad. Also research on spout designs (thanks to the myriad of ceramists that are great with this).
Here is the undecorated version: https://www.tinkercad.com/things/6SN3HFBTjmz-assassins-teapot-v35-makasmakot-dam
Here is the decorated version: https://www.tinkercad.com/things/cPqXbnghjhd-assassins-teapot-v35-makasmakot-dam-decorated
This is version 3.5. This is is the spout design I am happy with that does not have back-drip (that spills over to the other channel when you stop pouring). The location, placement, angle and sizing (at base and end) allows the surface tension to hold back the liquid.
Previous versions had the spout on the bottom and the pressure from the liquid was too high for surface tension to work.
Version 4.6 has been redesigned from scratch in Fusion 360 and is improved/changed in the following ways:
- holes now are on one side allowing one handed operation
- exterior and interior wall thickness is now 1.2 mm allowing for triple walls with a 0.4 nozzle (in my case allowed me to print much faster without loosing air/water tightness)
- handle has been thickened and shape changed (to something I find more convenient in the hand)
Fusion 360 files are attached.
Category: Kitchen & Dining
Tags
Model origin
The author marked this model as their own original creation. Imported from Thingiverse.


