Racing Circuit Coasters

Description
PDFDescription
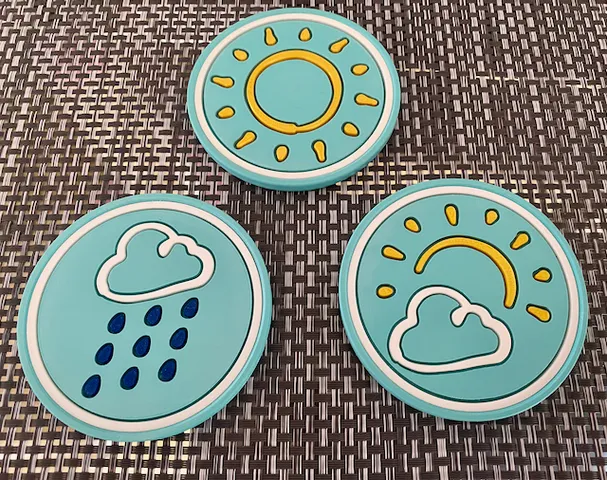
This is a collection of drinks coasters depicting various famous, and maybe not so famous, motor racing circuits.
The current tracks are:
- Laguna Seca - California, USA
- Oulton Park - Cheshire, UK
I have another model with all 22 circuits for the 2022 Formula 1 season here: https://www.printables.com/model/171285-formula-1-circuit-coasters
I have also created a compatible coaster holder, in various sizes, to help keep your collection tidy!
Print Dimensions
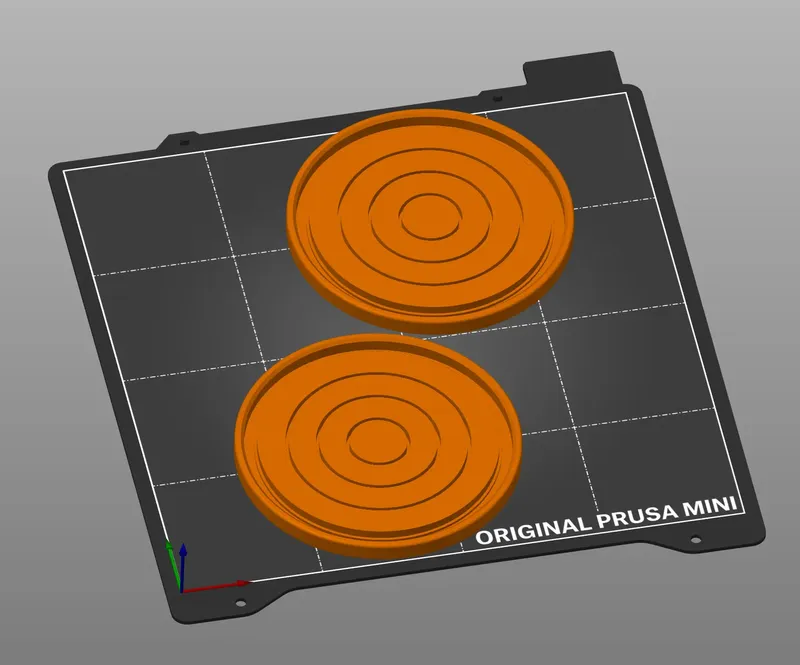
The coaster is 90 mm in diameter. The height of the main area of the coaster is 6 mm, with the total height being 7 mm to the top of the rim.
You can fit two coaster bases onto the bed of a Prusa Mini!
Coaster Parts
Each coaster has 4 parts that need to be printed:
- Base
- Beauty Ring
- Track
- Start Arrow
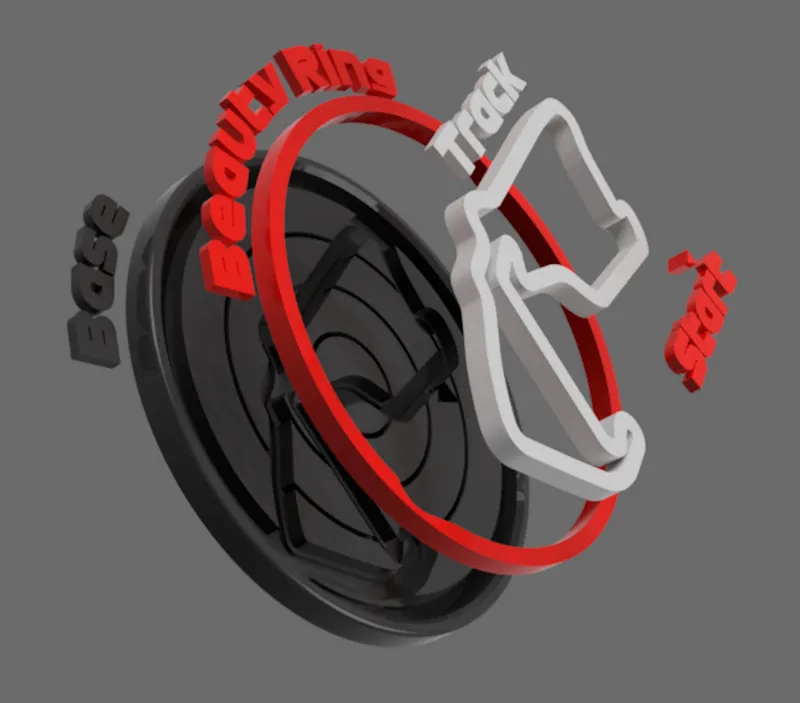
If you have an MMU or other means of printing in multicolour, you can choose to print the entire coaster in-place. The parts are all correctly placed in the 3MF files.
Files
I have included a 3MF file of each F1 coaster with all the parts in the correct place/orientation. I have also included the individual STLs. There should be no difference using one over the other, except maybe convenience.
Material Choice
This is up to you!
I was initially concerned PLA may be susceptible to damage or warping if a sufficiently hot mug or cup was used. However, after using these coasters (printed in PLA) for several weeks I have not encountered any problems. This is specifically with PolyMaker PolyLite PLA and Prusament PLA. Your mileage may vary based on type/brand of filament.
PETG and other similarly thermally resistant materials should have no issues at all.
Cold drinks shouldn't be a problem.
Print Settings
No special print settings are required for the Base, Track, and Beauty Ring. The Start Arrow can be a little tricky so you may need to experiment here with what is best for your setup.
For the most part, you can print everything at 0.2 mm layer heights. Infill is entirely up to you. You shouldn't need a brim/raft for any parts except maybe the Start Arrow.
The settings I have used on my Prusa Mini:
- 0.2 mm Layer Height for the Base (with 0.15 mm layers for the rim, see below).
- 0.15 mm Layer Height for the Track and Beauty Ring with 2 perimeters and 0% infill.
- 0.2 mm Layer Height for the Start Arrow.
I do not have access to a resin printer, so I can't offer any specific settings/guidance. However, I suspect this print will not present any significant challenge for a resin printer.
Some suggestions:
- The rounded top of the Base's rim may look nicer at a smaller layer height. You could print the majority of the Base at 0.2 mm, with the rim at 0.15 mm or smaller using a Height Range Modifier in PrusaSlicer.
The rim starts at 6 mm up from the bottom.
- The side of a part on the build plate tends to have a very nice finish. You may want to print the Track and Beauty Ring upside down, so the nicer finish is facing up. You will need to flip the parts yourself after bringing the 3MF into your slicer.
- Using the ironing feature creates a nice flat finish, which drastically reduces the amount of sanding required (or you can leave it as-is).
- I find using 0.3 mm for the extrusion width for top layers helps prevent any small gaps in awkward areas (especially if you choose to sand).
- Printing the Start Arrow can be challenging due to its small size (only 3 mm!) so you may need a couple of attempts to get it right. The good news is, this part is the same across all the F1 coasters, so you can print several and choose which are your favourite and/or look vaguely triangular and less blob-like!
I have found the most success with printing this part on its side (the longest face down on the build plate). By printing several instances you ensure each layer has a chance to cool down. If you have a print with a smaller nozzle size, this may be less of an issue.
Print Times
These are from my own experience with the Prusa Mini with defaults speeds for 0.15 mm profile.
Base: ~3 hours
Beauty Ring: ~30 minutes
Track: ~20 minutes
Start Arrow: Mere seconds!
Assembly
In the Base there are small recesses for the other components to slot into. The primary purpose of these recesses is to make sure the parts are correctly lined up.
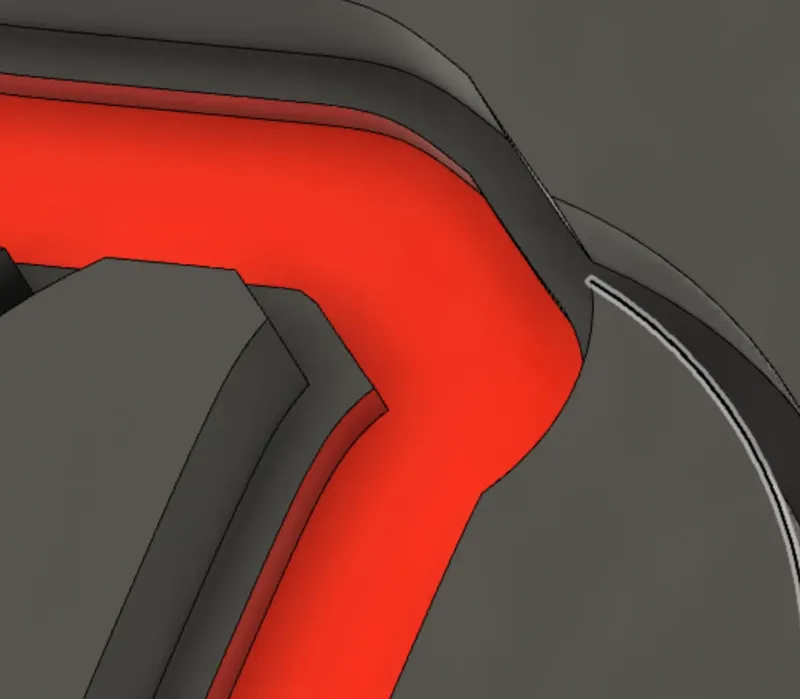
Here the recess is highlighted in red.
There is a 0.15 mm (0.2 mm for the Start Arrow) clearance in this recess that means the parts should slot in without much resistance. This has been designed so that it is easier to line the parts up in the base, so do not worry if the parts do not stay in by themselves. I recommend a small amount of super glue or other adhesive.
Depending on your printer's accuracy and/or material, you may find these parts end up being snap fit. If so, lucky you!
There is no particular order to the assembly.
Post Processing
If you like the fresh-off-the-printer look, you're already done!
I personally like to sand down these coasters to get a nice smooth finish. If using PLA, sanding is really easy (elbow grease aside). I tend to start at around 100 grit on just the base to knock back the top layer a little. I then move up to 200 grit to smooth out the previous pass. If you use ironing, or depending on how clean of a top surface you end up with, you can probably skip straight to a higher grit.
At this stage, I thoroughly clean the base to remove all dust and grease, then assemble the parts into the coaster. Once the glue has cured, I move up the grits from 400, then 600, then 800, then 1000 grit. I recommend giving the coaster a quick clean between grits to remove built up dust (it also makes it easier to see areas that need more attention).
Once at 1000 grit, it should be a very smooth surface. I call it a day here, but you could go further.
I have successfully used PlastiKote clear sealers on most of the coasters I have printed and it seems to work well and holds up against the heat of hot mugs. I suggest 4-8 light coats, letting each dry for at least an hour between. I leave the coaster for several days before using, to ensure the clear coat has thoroughly hardened. If in doubt, follow the instructions on your product.
Tags
Model origin
The author hasn't provided the model origin yet.