Prack-Rack; IKEA Lack Rack With Guide Rails

Description
PDFPrack-Rack is a fairly rudimentary guide/ rail system to help mount and un-mount rackmount server hardware consistently onto IKEA lack coffee/ end tables stacked together.
To achieve a lack-stack simply place multiple IKEA lack tables on top of each other.
To create a lack-rack we must use the force… of multiple supporting 3d prints. I used both the lack shelving system https://www.thingiverse.com/thing:3391658 by HeyVye (as outer rigidity) and https://www.thingiverse.com/thing:1550699 by h8tebringer (as inner rigidity). As long as you do not reduce the distance between the two front and two back legs you can use pretty much whatever leg connectors/ strengthening you would like. I do like how HeyVye's design matches up with my own however to create a snaking pattern.
Optionally: I would also drill equidistant holes between leg pairs to the right, back, and left, to help future cable management. I used https://www.prusaprinters.org/prints/15923-lack-attack-6-pass-the-lack-aka-wire-the-lack-stac by SoundDoc to cover the holes neatly. I added some castor wheels to the underside of the very bottom table-top. I would recommend getting very heavy duty wheels as lack-racks and by extension the Prack-Rack will likely hold very heavy equipment.. eventually.
To Prack-Rack your Lack-Rack start from the front outer-lip (where the HeyVye connector ends). There should be enough of a lip to flatly place one of the flat-ended connectors. Drill a hole behind the centre connector-hole. The connectors should have the countersink facing outwards, that way any wood screws can sit flatly with the rest of the connector, so they don't push rackmounted hardware out away from the lack legs. From now until you get to the bottom of the next HeyVye connector keep screwing and drilling the centre holes, placing new connectors on top of each other, as straightly as you can. There is usually some tolerance from left to right on rackmount hardware, so don't worry about slight deviance. Once you have finished one side mirror on the other. Now would be a good time to reward yourself with Haribos if you still have any!
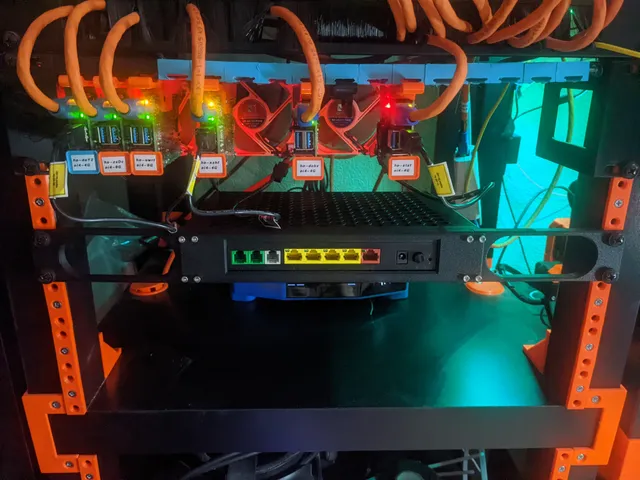
To mount hardware ensure the holes have been drilled out (based on guide rail empty slots) and insert rack bolts (M6) into rackmount hardware as usual over the top of the guide rail. This way the bolts will bite into the plastic and be in the wood, but if for whatever reason you need to unbolt and re-bolt or even change hole sizes you can just replace the guide rail/ customize the hole to your specification. This should not be used atleast alone to hold heavy equipment, in the image I show it holding a cisco switch, but note im not relying on it to hold big 6U computer cases or anything like that. If you did want to hold something heavier then you may have to rackmount both sides and install your own support rails to help hold the torquing weight from the back, or else I fear the wood would simply give way if it was only held suspended by the front. I am currently testing some potential 3d printed support rails and spacers, and I will post them if I get a heavier component to be comfortably seated.
Tags
Model origin
The author hasn't provided the model origin yet.